
Do you know how to create a nail salon booking system in WordPress? If you don’t, keep reading this article. Here is how to set up a nail salon booking in WordPress.
Running a modern salon requires an efficient appointment-booking workflow that lets clients book services without constant manual scheduling. If you operate a nail salon, setting up a WordPress booking website can streamline the booking process and help manage appointments more efficiently.
With the right WordPress booking plugin, you can create an appointment booking system that lets customers choose services, select an available time slot, and schedule appointments online. Many booking plugins include features like a booking calendar, automated email notifications, and options for staff members, such as each nail technician.
Using WordPress makes it easy to configure a user-friendly booking system that lets clients book manicures or pedicures online while helping nail salons automate scheduling and reduce missed appointments.
First, let’s see why your nail salon needs an online booking system.
Table of Contents
Why Your Nail Salon Needs an Online Booking System
An online appointment booking system is a must-have for nail salons that want to streamline scheduling and make it easier for clients to book services.
- A WordPress-based booking website allows clients to book nail salon appointments at any time by selecting the date and time that works best for them.
- A WordPress booking plugin simplifies appointment scheduling by providing a booking form, booking platform, and an easy-to-use dashboard to manage bookings.
- Using WordPress helps automate scheduling, allowing customers to book services online while reducing manual work for your salon team.
- Many booking plugin solutions support features like Google Calendar sync, SMS alerts, and online payments, making the booking process simple yet effective.
- A robust booking system is designed to let businesses looking to grow accept bookings directly online, so nail salons can focus on providing excellent services instead of managing schedules manually.
How to Create a Nail Salon Booking System in WordPress
Now, let’s see how to create a nail salon booking system in WordPress. For this, we need to use an appointment booking plugin. In our case, we will use the best-in-market option: Bookster.
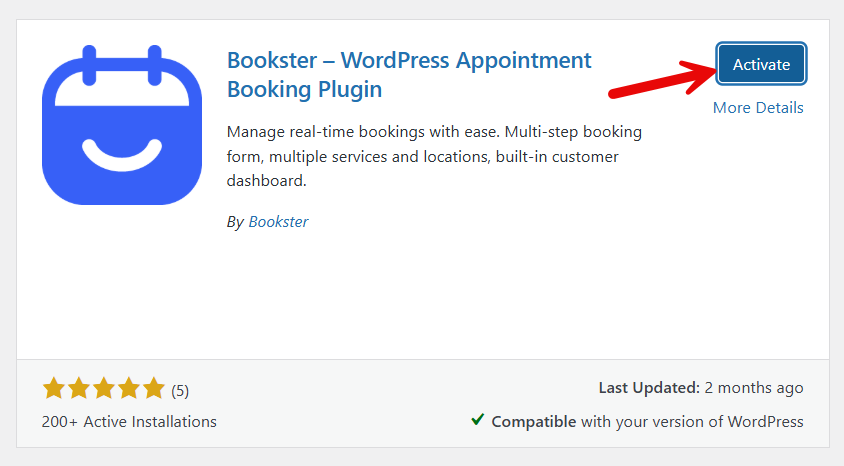
1. Installation and Activation

The first thing you need to do is install and activate the Bookster plugin on your website.
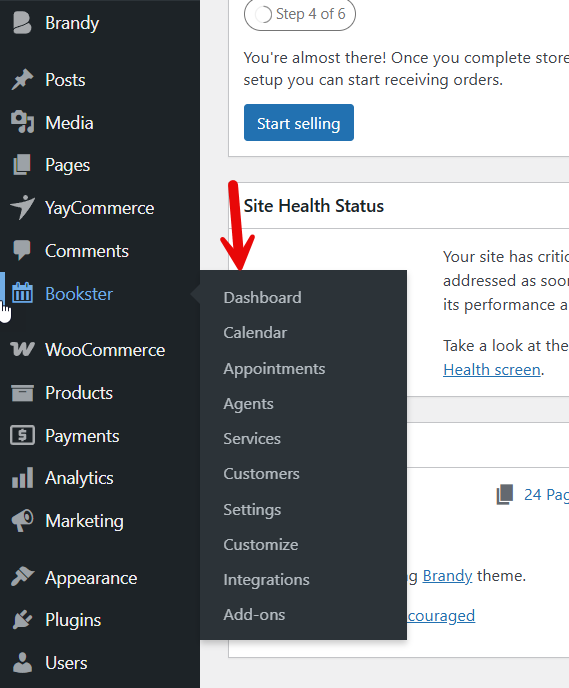
2. Bookster Customization
Now, you can see the plugin’s settings on the left-hand side of the dashboard.
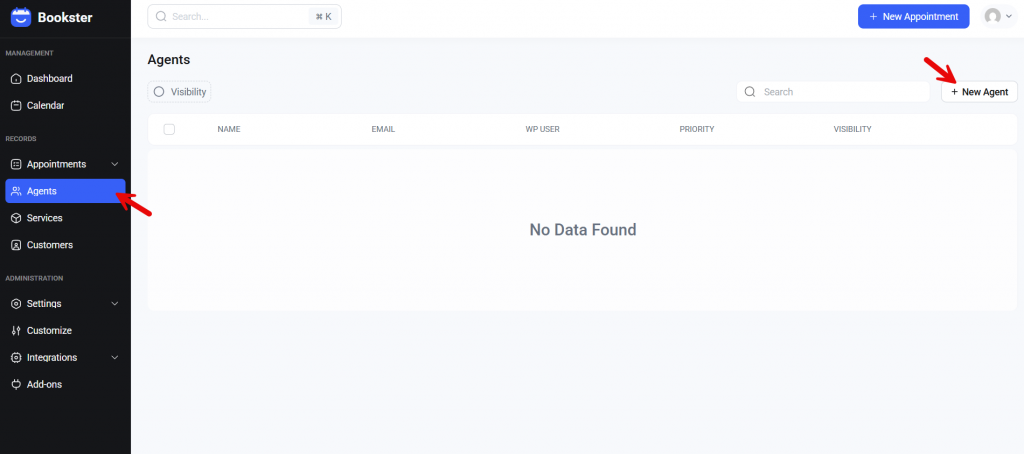
3. Adding Agents
The next step is to add agents. By default, there won’t be any agents, but you can add as many as you need.
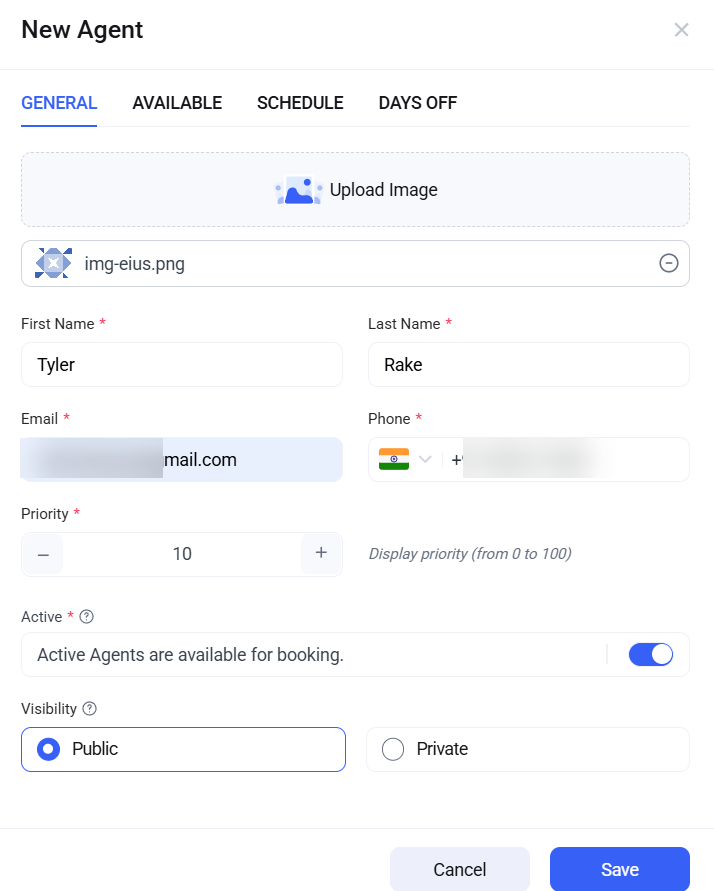
There are four configuration options you have to choose from:
- General
- Available
- Schedule
- Days off
3.1) General Settings
Under General Settings, you can add a profile picture for the agent, customize their name, enter their email address and phone number, mark them as active/inactive and public/private, and also set their status.
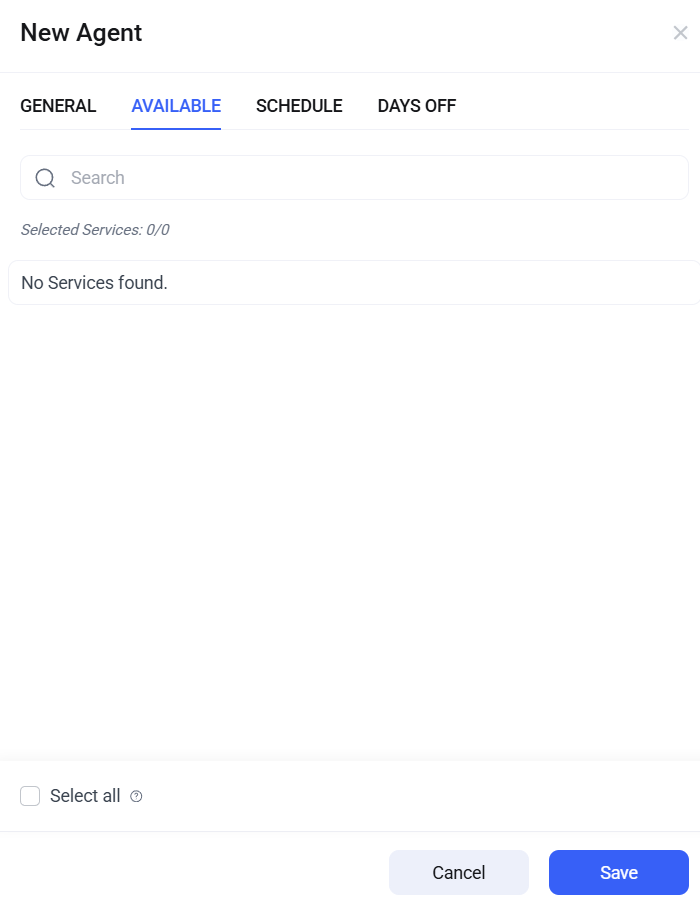
3.2) Available
Here, we will select the services assigned to this specific agent. Since we haven’t created services yet, we can’t see any options here.
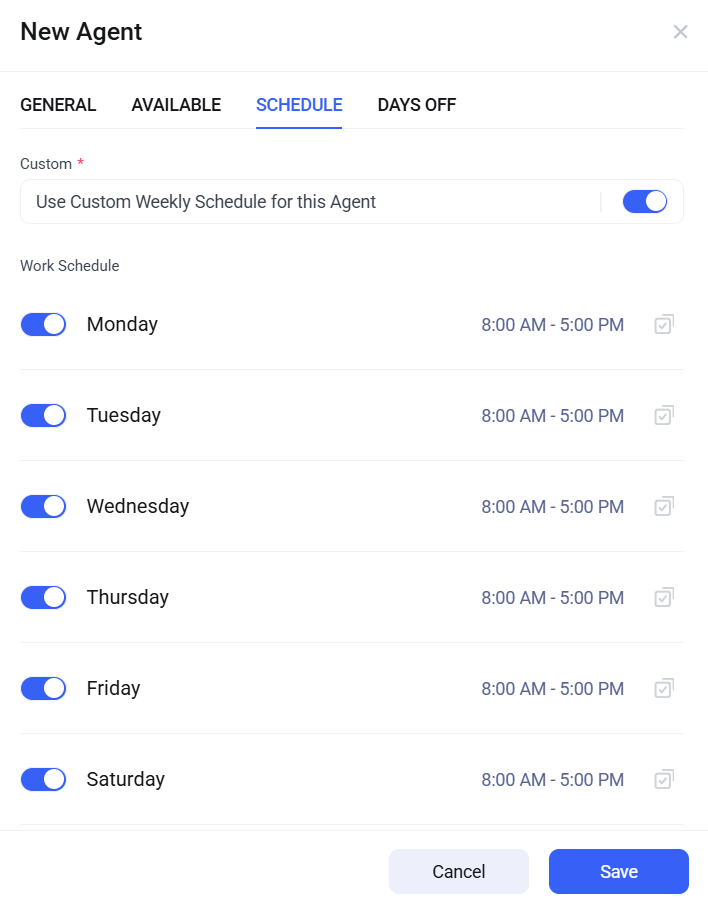
3.3) Schedule
If you need to set up a custom schedule for this agent, you can use this option.
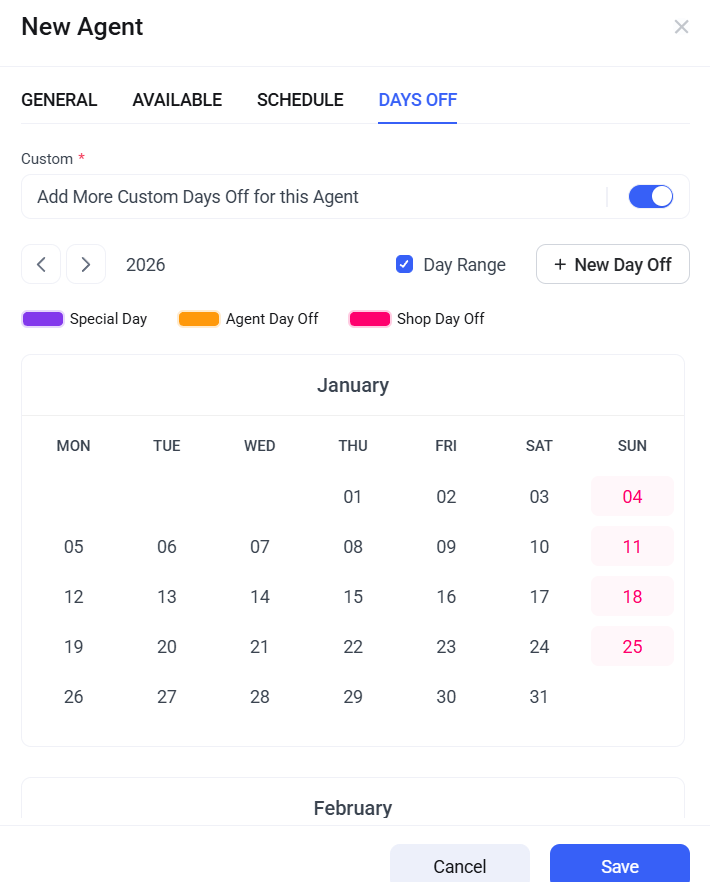
3.4) Days Off
In addition to the usual days off, you can use this option to mark specific days for this agent’s days off.
Once you are done, you can save the settings. And that agent will be shown here.
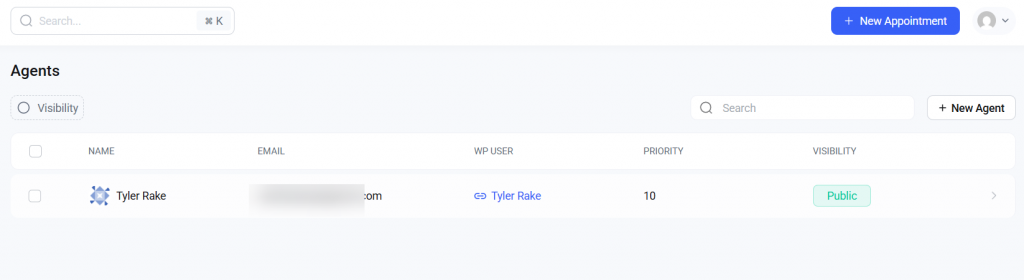
This way, you can add as many agents as you need.
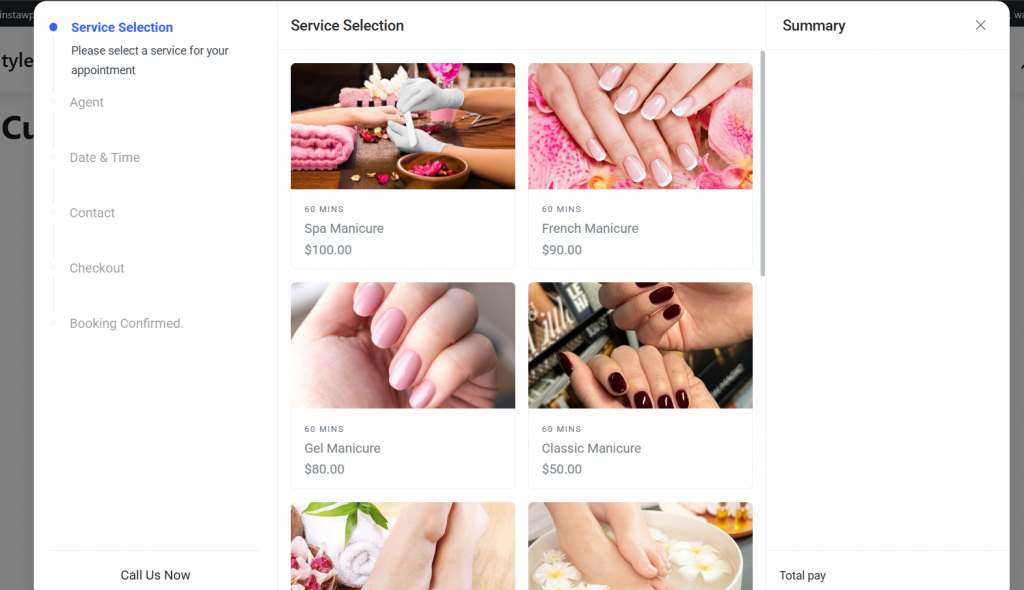
4. Adding Services
Now let’s move to the services section.

You can create custom categories and assign services under them. Since we are going to run a nail salon booking system, we will set up the services like this:
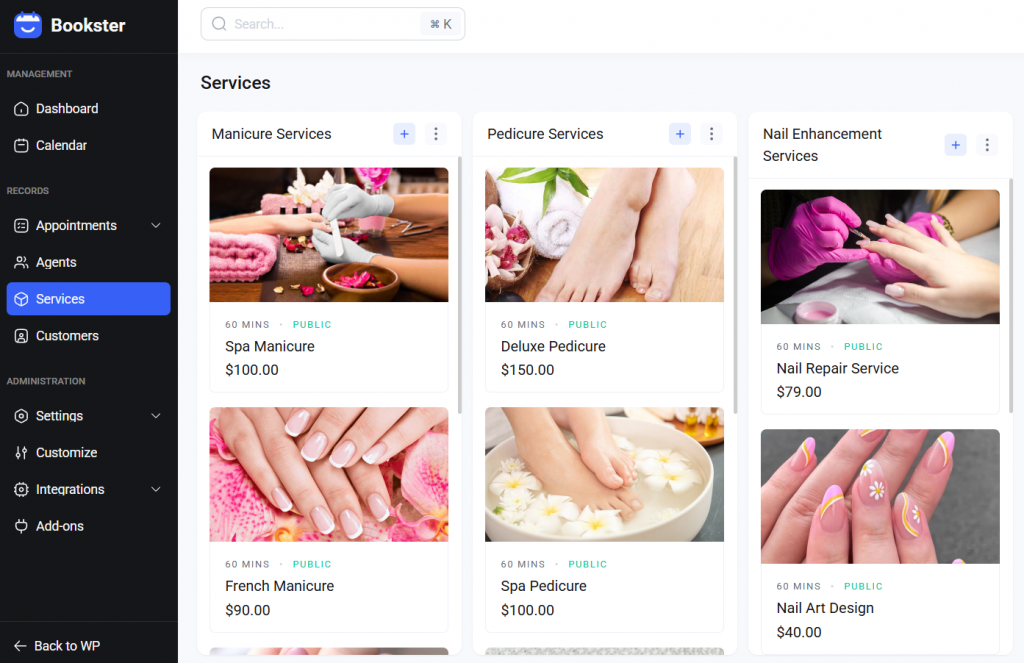
If you take a closer look at the service customization, you can see:
- General
- Available
- Schedule
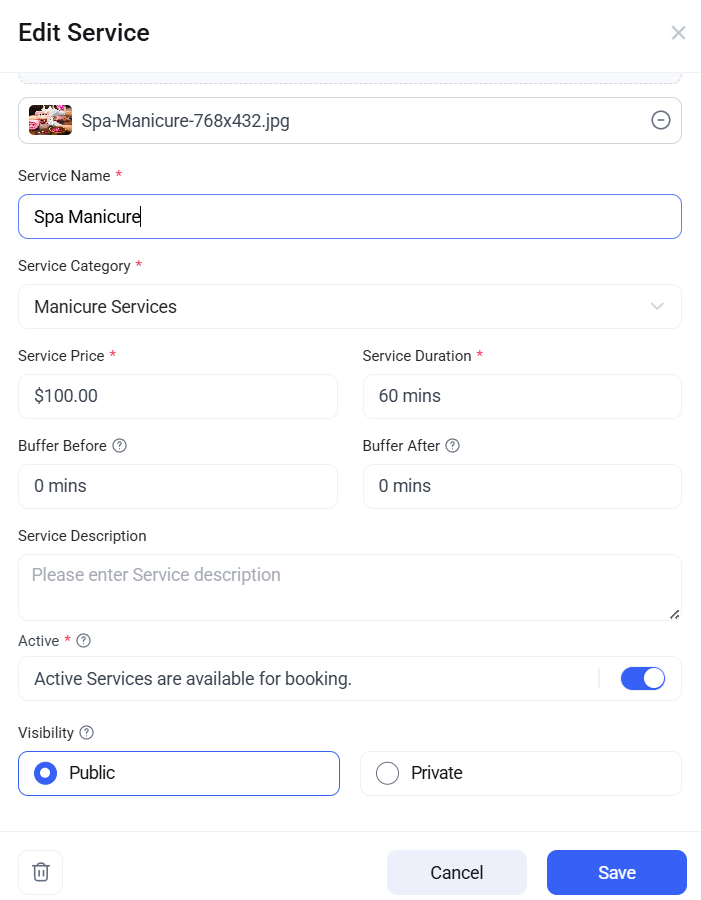
Under the general option, you can set the service name, price, time, and a picture to make it easier to understand. Another option you will find is visibility (public/private).
In the next section, you can choose which agent will handle this service. You can always choose all the agents you need.

Next, you can set a custom weekly schedule.
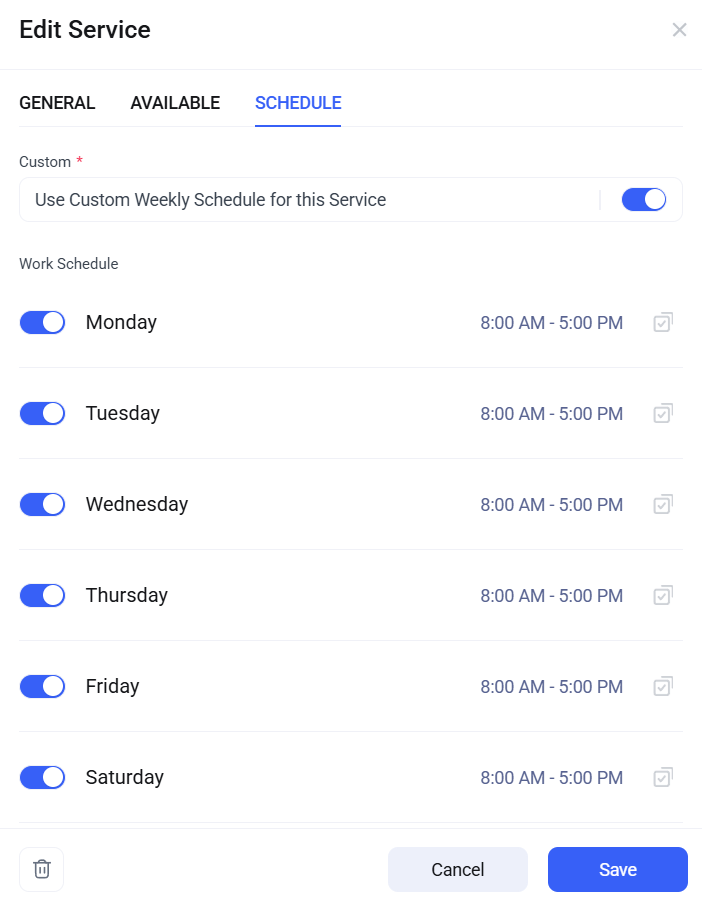
If an agent is available only on specific dates, choosing this option and customizing the timing might be ideal.
5. Settings
Now, go to the settings.
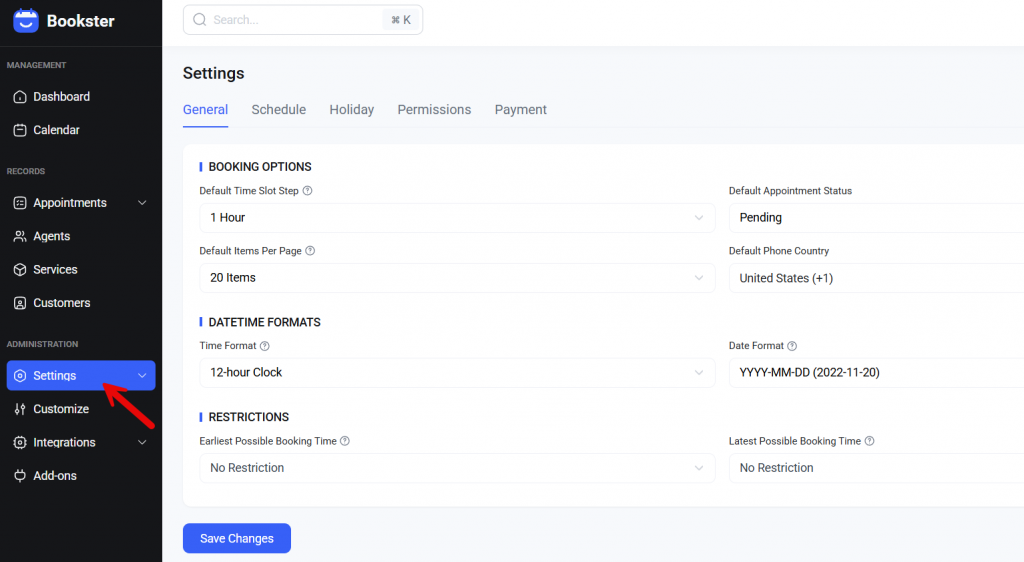
There are five major options.
- General
- Schedule
- Holiday
- Permissions
- Payment
Let’s see what each has to offer.
5.1) General
Here, you can tweak the default Bookster options.
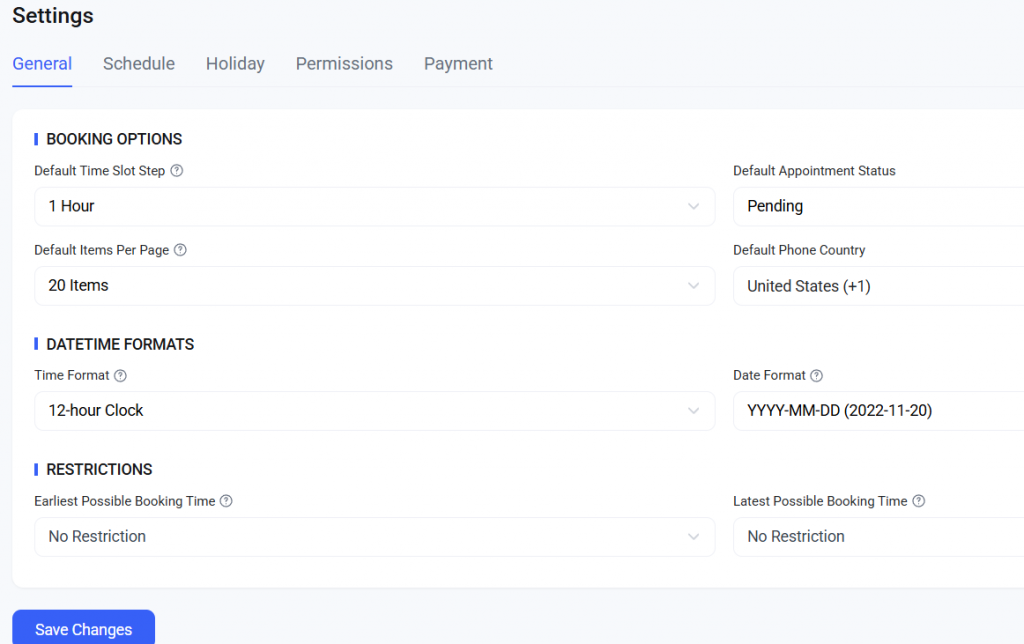
For example, you can see options like:
- Default time slot step
- Default appointment status
- Default items per page
- Default phone country
- Date format
- Time format
- Restrictions
According to your business, you can change these values.
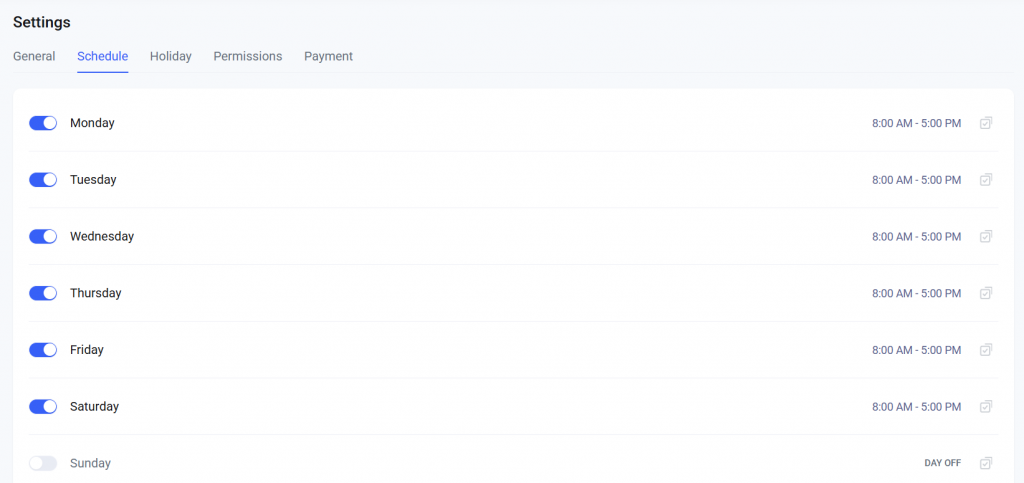
5.2) Schedule
From the schedule option, you can customize the store’s timing.
5.3) Holiday
Here, you can see the calendar.

If you need to mark custom holidays, you can do it here.
5.4) Permissions
Next is permission options.
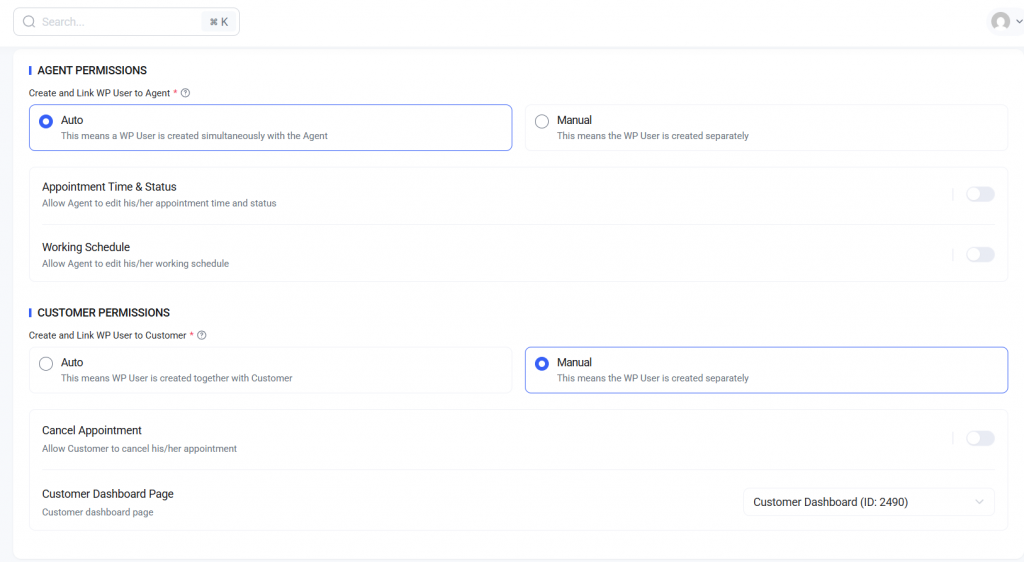
Here, you can tweak both agent and customer permissions.
5.5) Payment
The final option is payment.
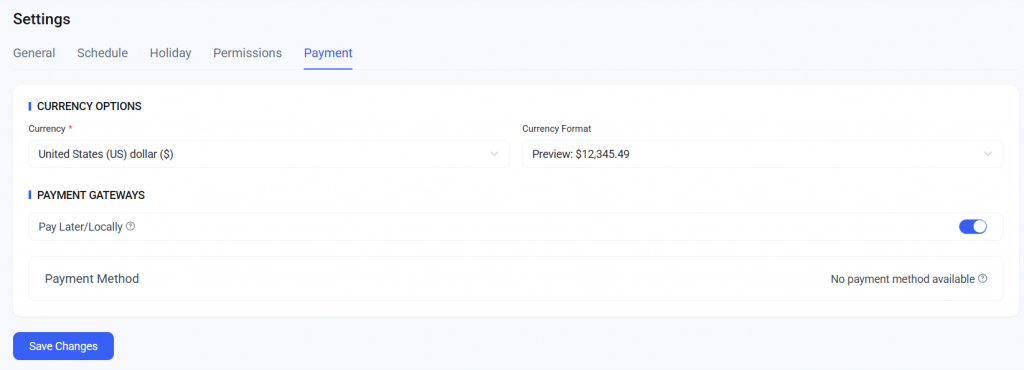
If you look closely, you can see the “pay locally” option. But Bookster also supports PayPal and Stripe integrations. To enable those, go to the integrations and select the one you need.
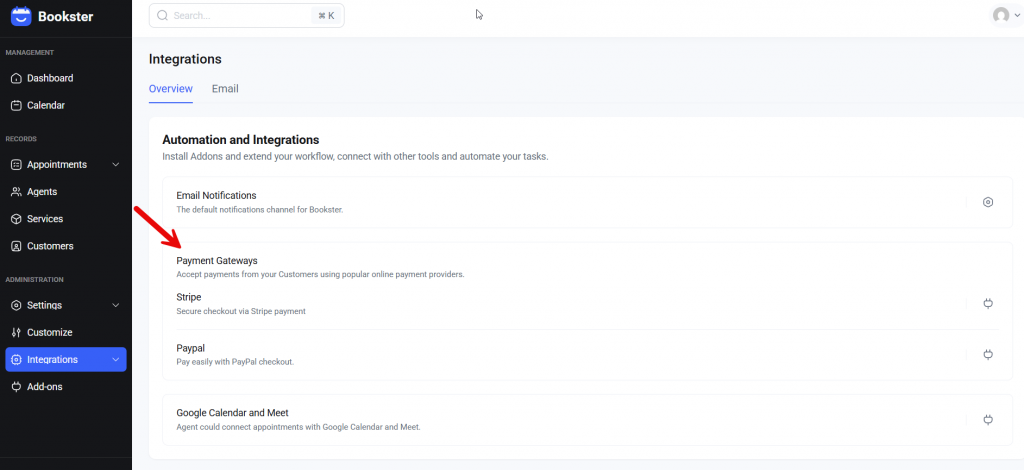
You can download the add-on and start customizing it. Once you have integrated a payment gateway, you can start collecting payments online.
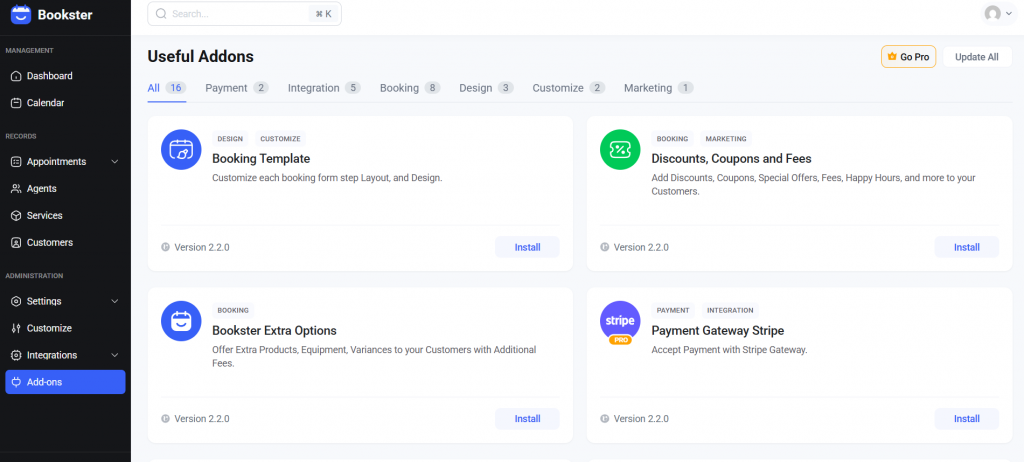
6. Add-Ons
Add-ons will help you add more features to your website. Here, you can see all the add-ons you can use on the website.
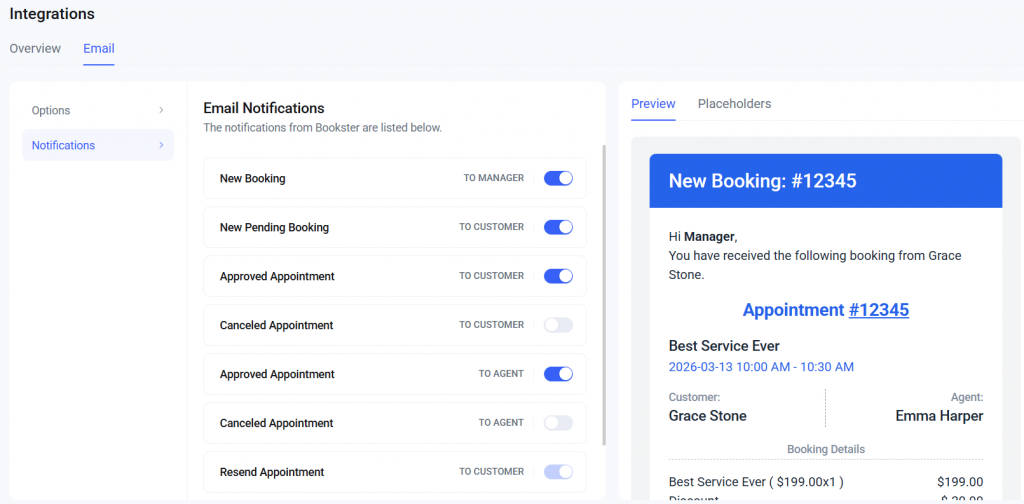
7. Email Customization
From here, you can customize the email template.

You can also enable/disable specific email notifications from the same page. You also have an option to tweak the templates.
Testing the Booking System
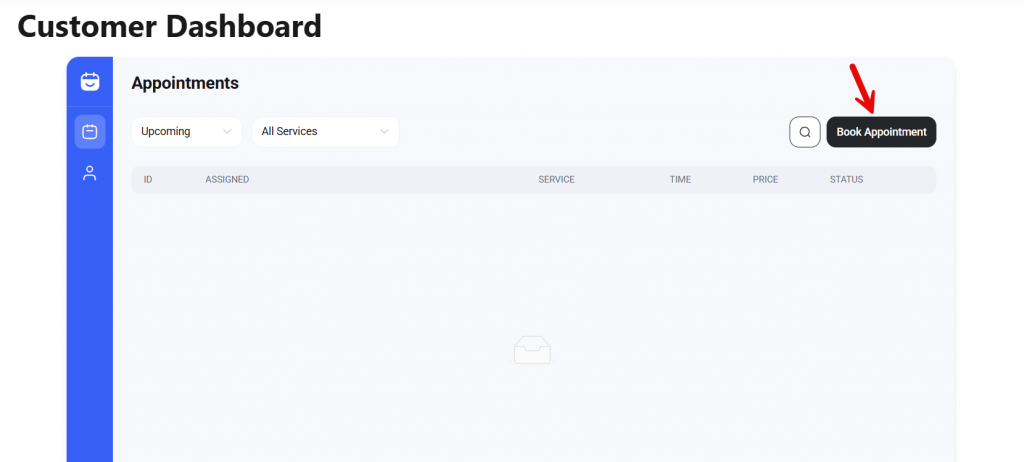
Now, we can test the booking system. You can go to the customer dashboard page to start the booking process.
Or, the plugin also gives you shortcodes that you can embed on pages or posts.
Now the process will start.
The available steps are:
- Selection
- Agent
- Date and time
- Contact
- Checkout
- Booking confirmed
You can also see the total amount on the right-hand side.
That’s it!
This is how you can create a nail salon booking system in WordPress.
Best Practices for Nail Salon Booking Systems
A well-planned booking system helps nail salons streamline appointment booking and manage schedules more efficiently.
- Use a reliable WordPress booking plugin that works seamlessly with your WordPress theme and supports customization options to tailor the look and feel of your booking website.
- Clearly define working hours and configure your scheduling system so clients can choose the best time to schedule appointments for specific services.
- Customize the booking template and add a clear service button so customers can click and easily select services from a searchable list.
- If you’re using a scheduling plugin with a free version, configure the essential features first, then add new options or add-on tools based on your salon’s specific needs.
- Ensure your booking WordPress setup allows you to add unlimited services, manage employees’ availability, and receive automated notifications to keep the appointment process organized.
Frequently Asked Questions
Now, let’s take a look at some frequently asked questions and answers about this topic.
What are the steps to create a nail salon appointment booking system in WordPress?
The main steps to create a booking system include installing a booking plugin, adding services, setting working hours, and placing a booking form on your website. With a WordPress booking plugin like Bookster, you can quickly create an appointment booking system that lets clients schedule nail salon appointments online.
Which booking plugin is best for managing nail salon appointments?
A good booking plugin should support appointment booking, staff management, and service scheduling. Bookster is a powerful WordPress booking plugin that helps salons manage bookings, services, and staff from one dashboard.
Can I create an appointment booking system in WordPress without coding?
Yes. Most WordPress booking plugins are beginner-friendly. After installing the plugin, you can add services, assign a nail technician, set a schedule, and publish the booking form on your website without coding.
How does a WordPress booking plugin help schedule appointments?
A WordPress booking plugin allows clients to select services, choose a nail technician, and pick a time slot. The system manages the schedule automatically and prevents double bookings.
Can customers book nail salon appointments directly from my website?
Yes. A WordPress-based booking website lets clients book nail salon appointments directly online by selecting services and choosing an available time slot.
How do I manage nail technicians in a WordPress appointment system?
Most systems allow you to add each nail technician and assign services to them. This helps organize schedules and manage nail salon appointments more efficiently.
Why should nail salons use a WordPress booking platform?
A WordPress booking platform helps automate appointment booking and simplify scheduling. It allows clients to book services online while salons manage appointments more easily.
Conclusion
Creating a booking system for your salon is one of the easiest ways to streamline nail salon appointments and improve customer convenience.
By using WordPress and a reliable booking plugin like Bookster, you can create an appointment-booking system that lets clients book services online, choose their preferred nail technician, and schedule a suitable time slot.
A WordPress booking plugin also helps automate scheduling, manage working hours, and organize appointments from a single dashboard.
This simplifies the entire booking process for both salon owners and customers. Once your WordPress appointment system is set up, your nail salon can focus more on delivering great services while the booking platform handles scheduling efficiently.
Which other website would you create with Bookster?
Let us know in the comments!