
Operating a digital business like membership or subscription services means that you will be handling a large number of documents and files. You may need a proper organization to trace your stored files for WordPress document library. That’s why creating a document library on a WordPress site is important. With this library, you will be able to store, retrieve, organize, and manage your documents easily.
WordPress has a variety of plugins that you can use to create a document library. FileBird Document Library is one of those incredible plugins. And it is available for free.
This article will look at the step-by-step procedure of creating a WordPress document library using FileBird. Stay tuned.
Table of Contents
Install FileBird and FileBird Document Library
WordPress comes with a myriad of plugins. However, you must download from the site and activate them to reap the benefits. FileBird Document Library is a plugin on its own.
However, since it is an add-on plugin, you will have to install the main FileBird plugin for it to work.
So, before creating a document library, ensure you have downloaded the right plugins for the job:
- FileBird – WordPress Media Library Folders & File Manager
- FileBird Document Library
To achieve this:
- Check if FileBird is available from the plugins and click download.
- Go to Add Plugins and select Add New.
- Click on the Upload plugin from the page that will pop up.
- WordPress will redirect you to the files, from which you should select the FileBird zip file you downloaded.
- Once uploading is over, click Install Now and give it a few minutes for a successful installation.
- Select Activate.
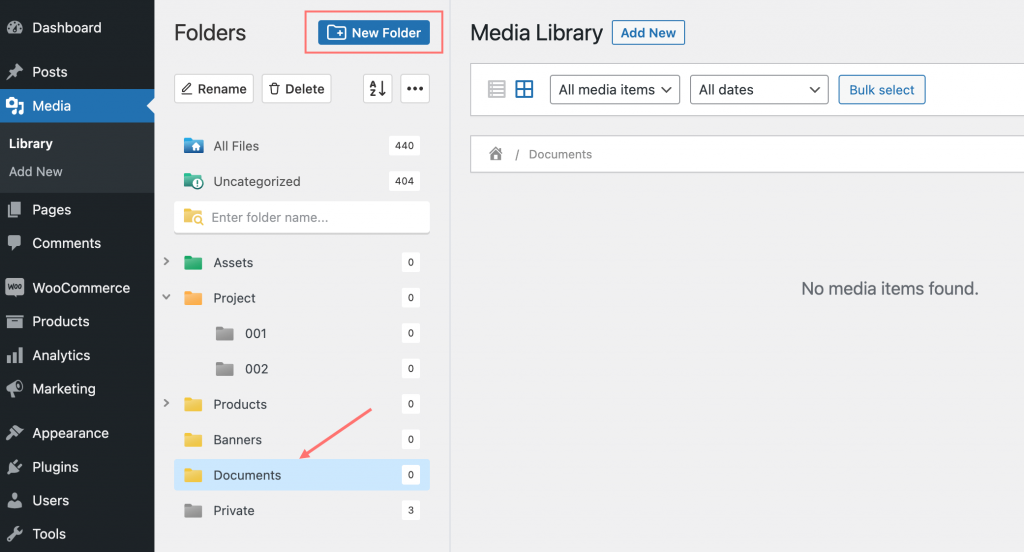
- Create your folder structure, you can name your folder as Documents as shown in the screenshot below.
Categorize Your Documents into a Folder
If you haven’t already done it, please upload documents to the FileBird document library.
Like a typical walk-in library, a document library acts as a storage or inventory for your WordPress documents. Therefore, once your library is in place, you need to stock it with the right documents and media files from your file manager. So, to add documents to your library, click Add new and choose file upload.
If you have many files to upload, you may need a lot of time to find them. The good news is that you can select and upload multiple folders and files at once. To do this, press the shift or ctrl key on your keyboard, just like you do when choosing many files from your computer storage. The shift key enables you to select consecutive files, while the CTRL key lets you choose files in no particular order. Once you have all your documents in the library, you can play around with the available features to customize the FileBird document library.
You can add documents to your library using any of the following methods:
- Add manually – This involves the same procedure as manually adding a page or post in WordPress. Here, go to Documents and click on Add New. Add details such as file name, type, etc., and a brief description. Click on either File Upload or Custom URL if you’re adding a downloadable file or a clickable link. If you intend to embed the file in the content, don’t click on any of the mentioned options. Click on Publish to add the selected document to the library.
- Add documents from the WordPress library – WordPress also has a documents library from which you can retrieve files and add them to your FileBird document library.
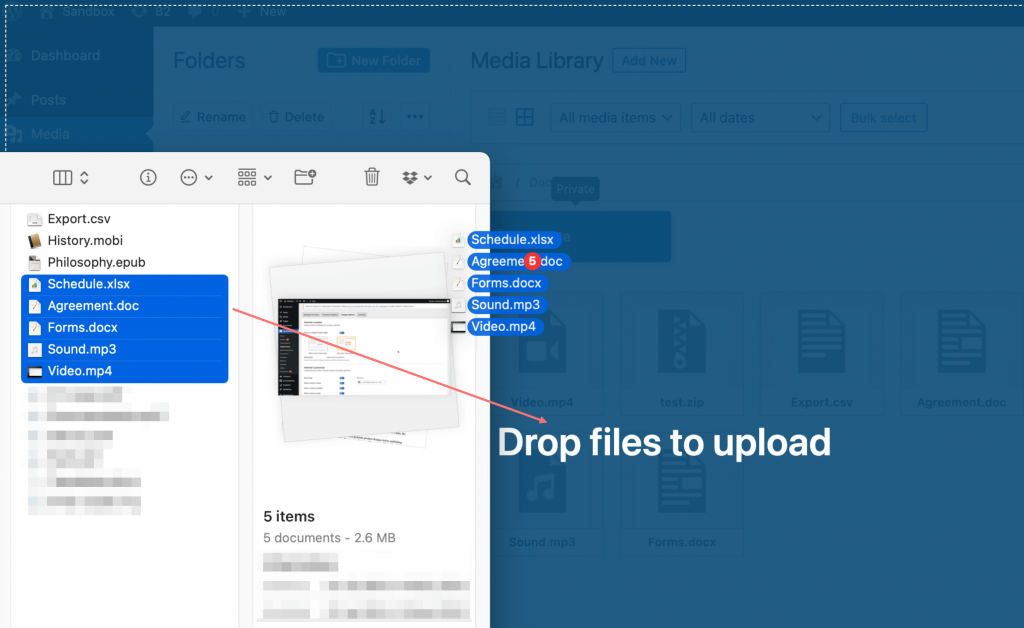
- Drag and drop files – This is one of the easiest methods of adding files in the FileBird documents library. Go to documents, and you will be redirected to the file manager—drag and drop files to the library.
- Import files from CSV in bulk.
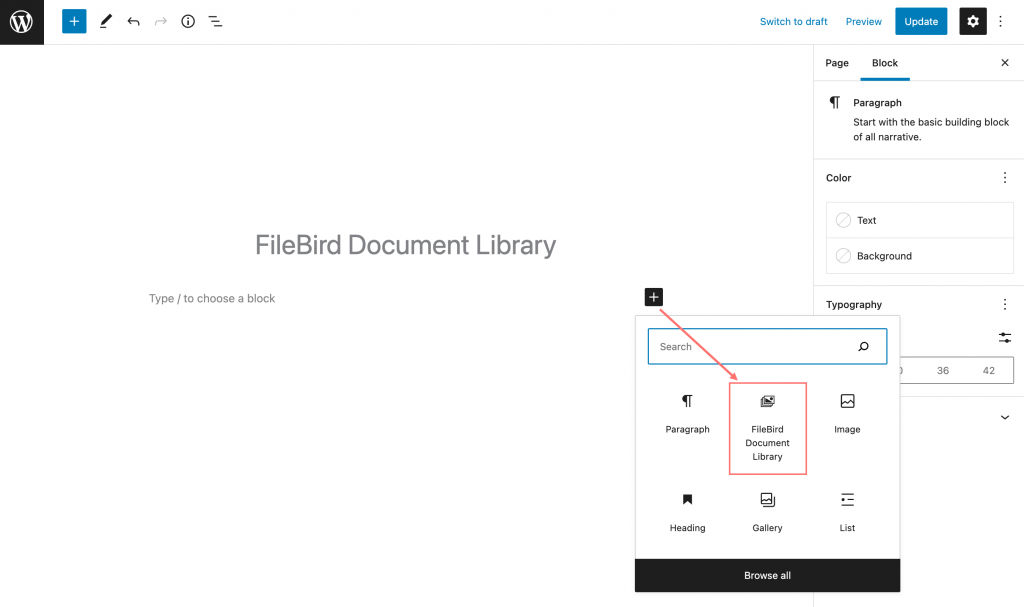
Insert a FileBird Document Library Block
After installation, open the post editor and insert the FileBird Document Library from the FileBird add-on plugins. You can insert it in any of your WordPress pages or posts. Remember, FileBird is a plugin that helps organize your documents in folders. This means that by creating a document library, you will have easier access to your documents directly from the post editor.
FileBird Document Library allows you to select folders right from the post editor.
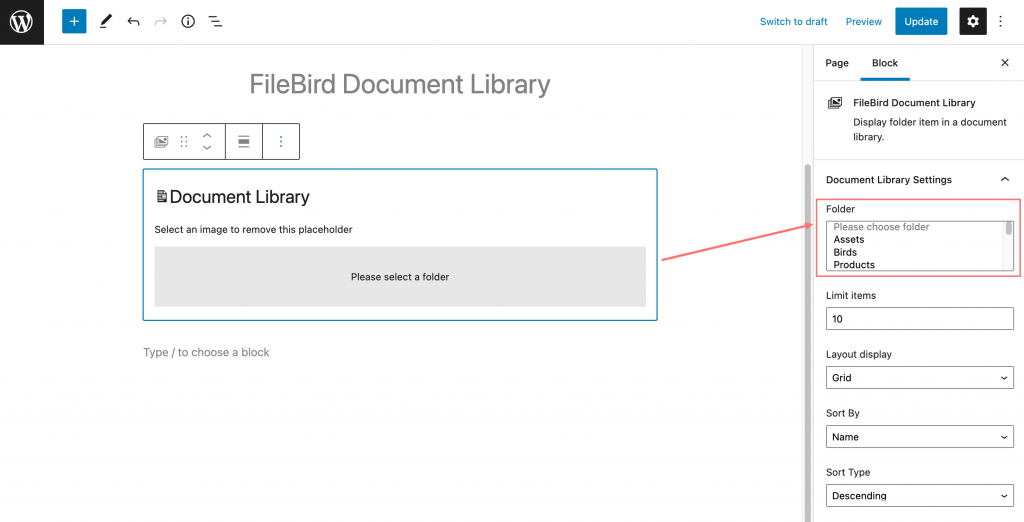
You can output multiple files from the folders and include them in your content. This simplifies the process of adding media files to your content.
Configure and Customize the FileBird Document Library
As mentioned earlier, the document library enables you to access documents easily. However, you have to manually configure it to what you prefer. For instance, if you prefer a grid view to a list view of your documents in the FileBird documents library, the configuration lets you choose between the two.
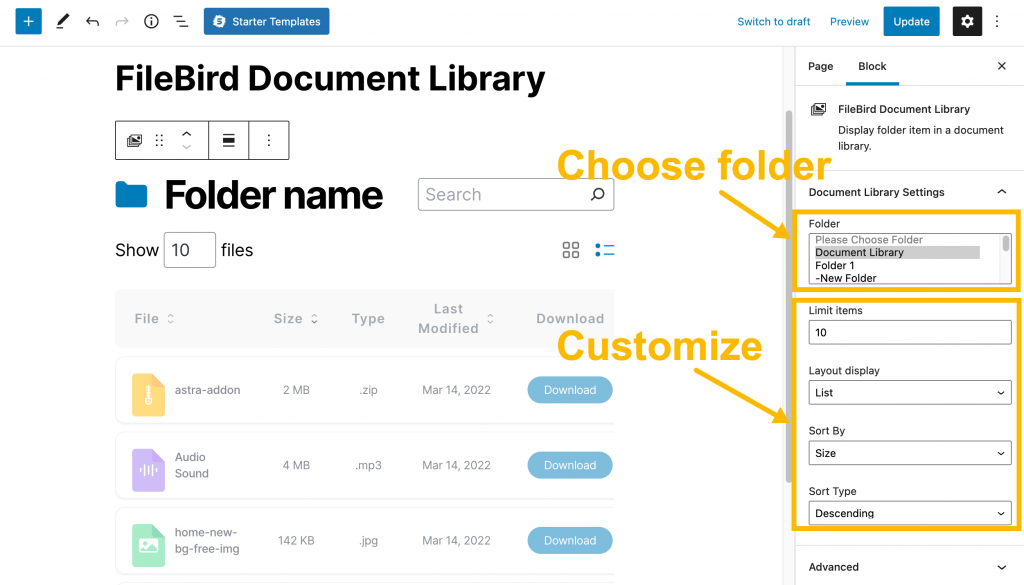
The following are some of the settings recommended during configuration:
- Folders – You can always have your documents arranged in folders or outlined as a single list. When you tick folders during configuration, every document you upload will automatically move to a specified folder.
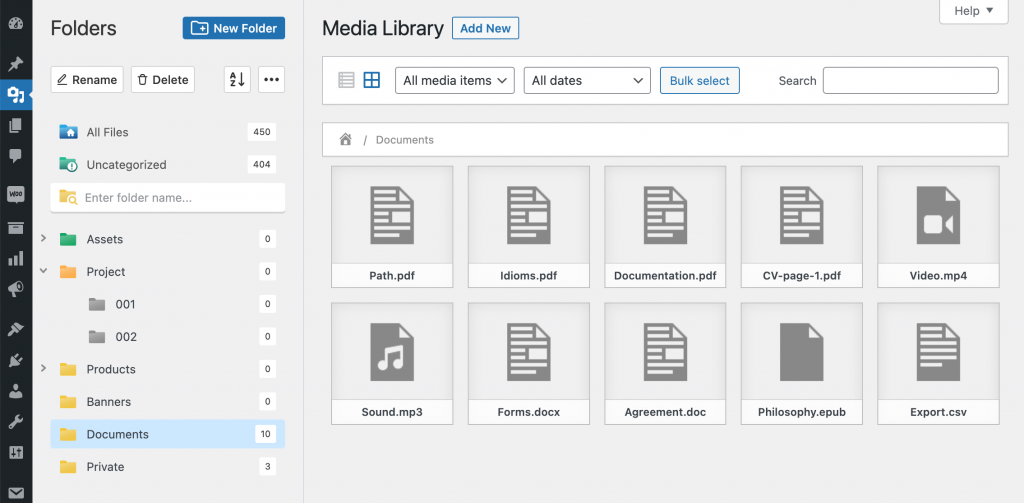
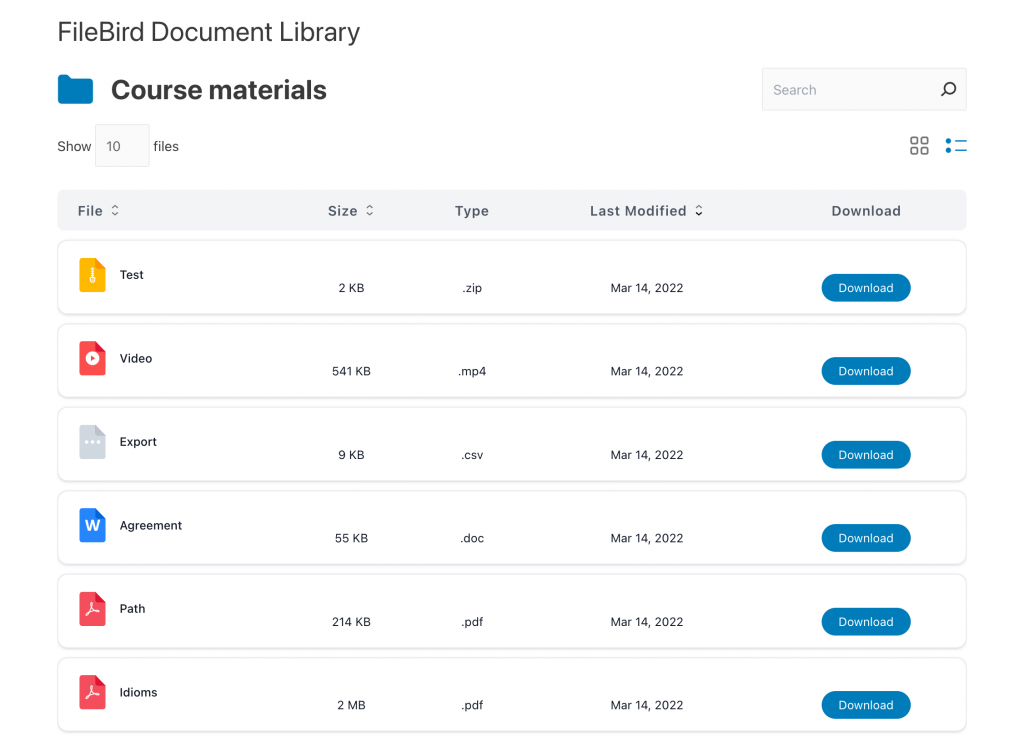
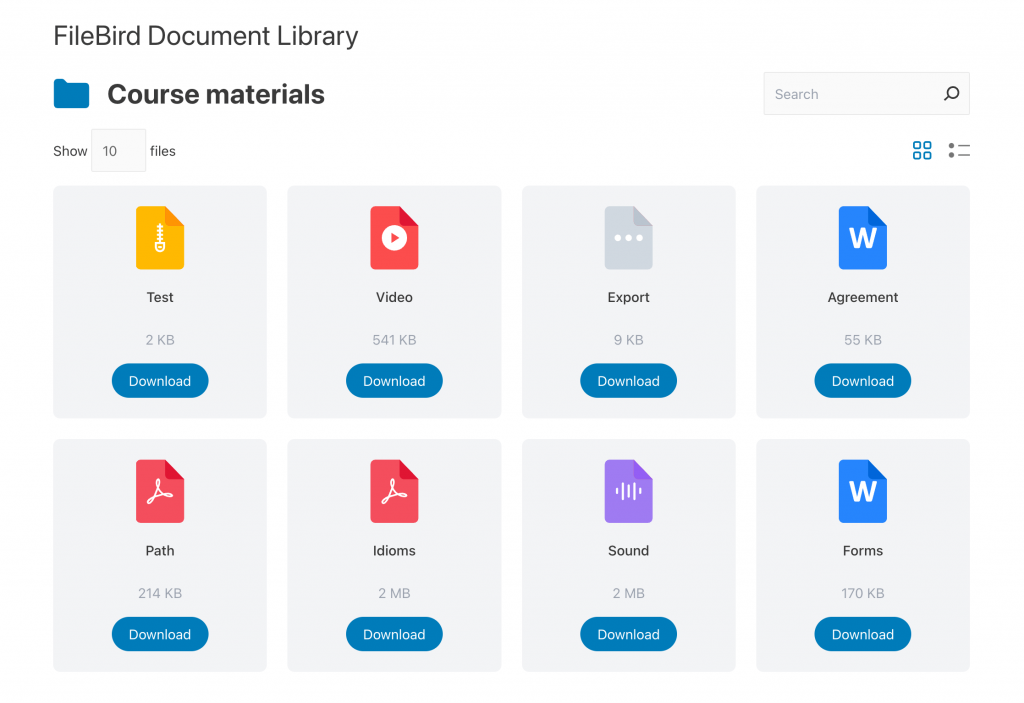
- Layout – When working with the FileBird document library, you can view your documents in a table or grid.
The table view is the best option if you have many documents to view. It is also recommended for users who want to trace their documents by searching.
On the other hand, the grid view is good for a small number of documents in the document library. So, depending on the number of documents you have, you should choose between the two options.
- Search filters – Considering the large number of documents in the library, it is prudent to include search filters to enhance the retrieval process. In your configuration, ensure you add tags, categories, or any other taxonomy that can guide the user.
- Link text – These words will direct users to specific areas of your site or help them perform an action. Such include View, download, etc. You can also customize the link style to suit what you like.
- Columns – Columns typically help in the identification of documents. They include category, file name, file type, file size, date of publishing, and modification date. During configuration, you can choose which columns to include in the FileBird document library. You can also rename the columns to your preference.
Use Shortcode to Publish FileBird Documents Library
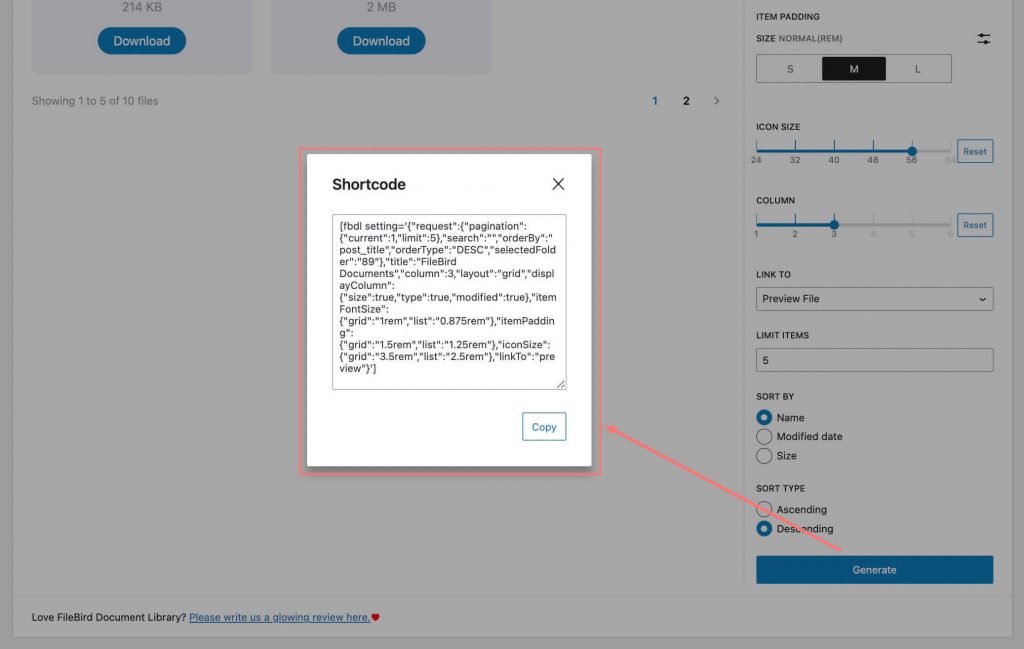
To view your document library shortcode:
- Go to WordPress Admin and click on Pages.
- Locate a page known as the document library and rename it if you want.
- By clicking on Generate, you can achieve a shortcode to embed into WordPress page using page builders like Elementor, WPBakery, Visual Composer, and other website builders.
- Similar to using Gutenberg, the visitors also see all the documents you added to your document library. Depending on how you configured the settings, the layout will either be as a grid or table.
- If you’re unhappy with some of the settings you made, you can always configure them again.
Then, add your page link to where you want to display on your website home page. If you’re fully satisfied with the appearance of your library, go to Appearance and click on Menus.
On the navigation menu, add a Document Library link to direct users to the library.
Conclusion
Dealing with many documents, you will likely need a perfect tool to help organize them if you want some easy time. That’s where FileBird comes in handy. It has an add-on plugin called FileBird Document Library along with FileBird Document Library Pro.
The sole purpose of this plugin is to keep your documents organized and enhance retrieval during post-editing. While many other plugins can do the same job, FileBird presents some special features, as discussed in the article. Follow the step-by-step process to create a document library using FileBird.