Do you want to manage WordPress users in database with MySQL? If you are looking for a step-by-step guide, keep reading this article. We will show you a simple method for doing so.
If you are going to manage a WordPress website or WooCommerce store with multiple users, managing them individually can be challenging. When you log in to the WordPress site as an administrator, the CMS will allow you to tweak the user settings.
But is there any other way available to manage users efficiently?
If you want a hassle-free method for managing users in your WordPress installation, keep reading this article. It will show you how to manage WordPress users in database with MySQL.
But before going further, let’s see when you need to manage users via MySQL database.
Table of Contents
When Do You Need to Manage Users via MySQL Database
You need to use the MySQL database method on multiple occasions. For example, you’re a tech-savvy person who likes to explore new coding methods. Instead of using WordPress users’ settings, you can use the PHPMyAdmin method to handle users.
On the other hand, if you can’t access your website with your existing administrator credentials, you should try to create a new admin account. Similarly, you can use the MySQL method to modify the user details or roles.
Now you know when to use the MySQL method to manage users. The following section will show you how to manage WordPress users in database with MySQL.
How to Manage WordPress Users in Database with MySQL
Here, we will show you how to:
- Add a new administrator
- Modify the user details
- Delete the user
- Change the user role
And so on.
However, the first thing you need to do is access the MySQL database. This depends on the hosting provider you are using. For example, if you use Cloudways as your hosting provider, you can click the database manager to access your MySQL database.

If you use other hosting providers, you can log in to cPanel, where you’ll see the PHPMyAdmin option. Finally, if you have installed WordPress locally, you can access the database with the AdMiner option.
For this tutorial, we will be using a local installation of WordPress.
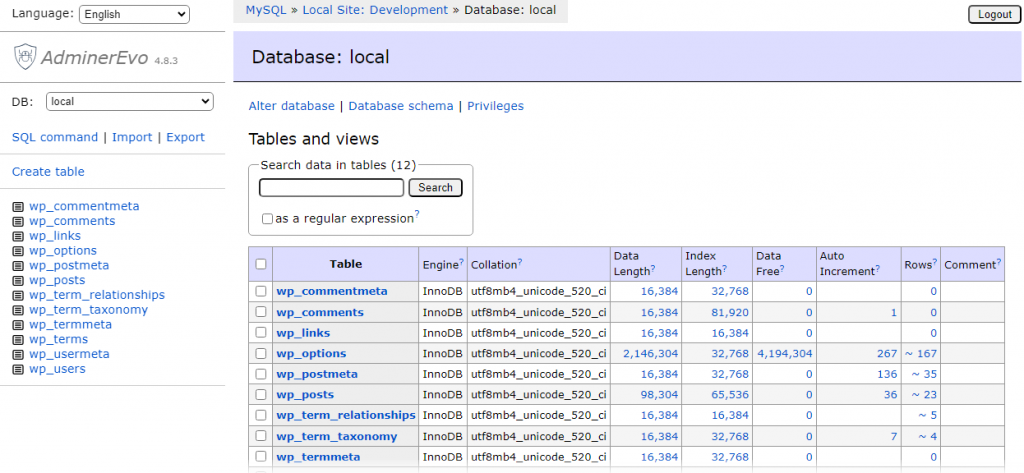
Now, let’s see how to use the MySQL database for user management.
1. Add a New Administrator
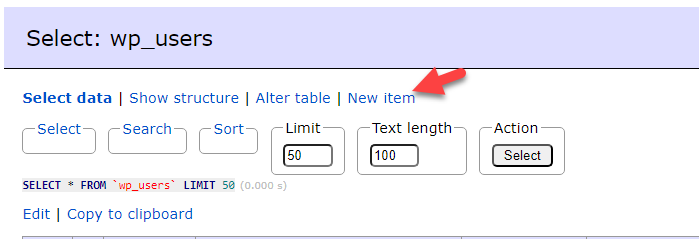
We will be dealing with the wp_users table. You can find it inside the MySQL database.
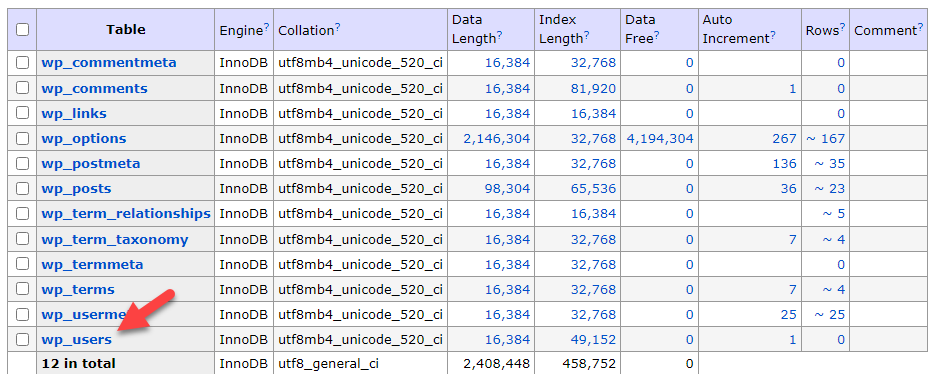
There, you can see all the registered users on your WordPress website.
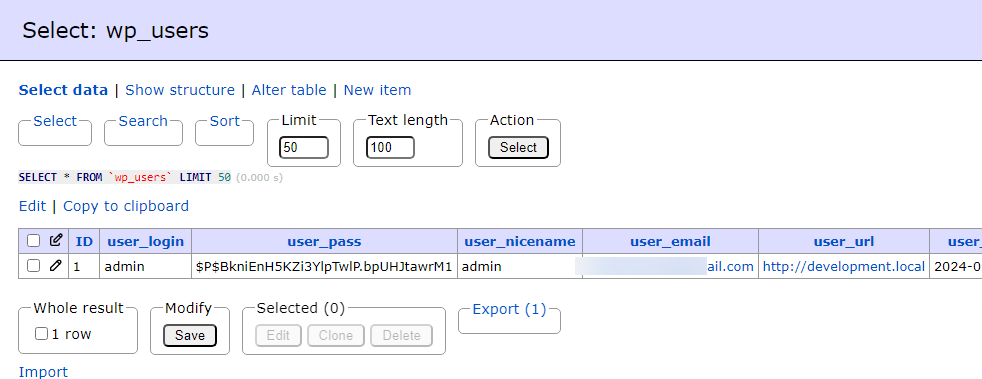
Click the new item button to add a new user to the website. In some cases, it will be labeled as Insert.
From here, you can insert a new WordPress user.
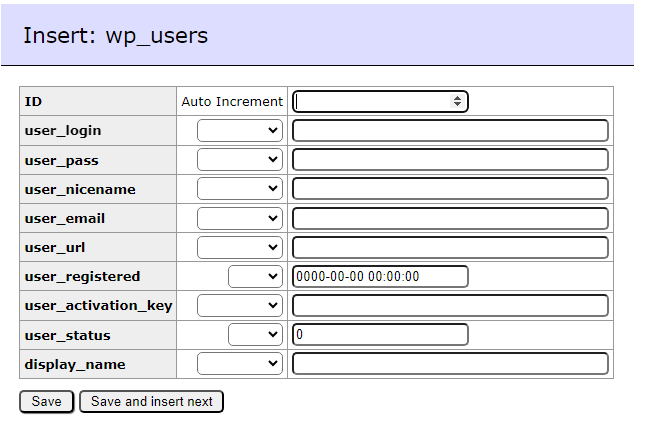
You will see several datasets on the screen:
- ID: This is a unique ID created by WordPress. WordPress will automatically assign one, or you can pick one.
- User-login: This is the username of the account.
- User_pass: When you set the user password, ensure you have selected MD5 from the dropdown. Once you have done that, enter the password you like and are ready to move forward.
- User_nicename: This will be the user’s nickname.
- User_email: This will be the email address associated with the user account. So enter this carefully. WordPress will use this for password resetting purposes.
- User_url: This will be available in the author bio.
- User_registered: This is the date and time of the user registered.
- User_activation_key: Not required.
- User_status: You should set this value to 0.
- Display_name: The display name will be visible at the front end of the website for this specific user.
Fill in the details according to your liking. Here’s a sample data:
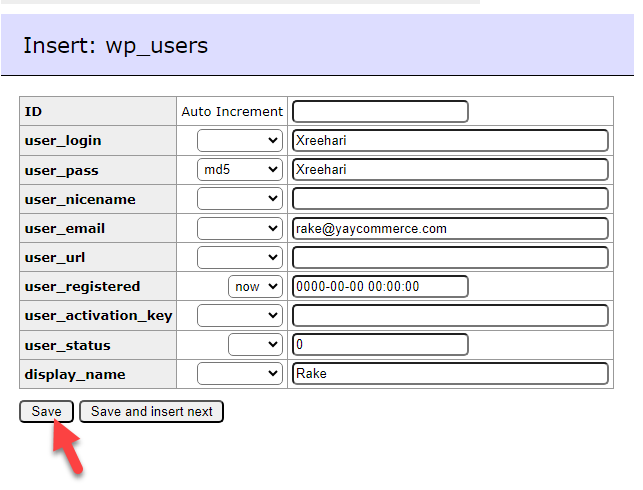
You will see the newly created user account if you check the user’s table.

So far, we have created a user account (the ID is 2—remember that) but haven’t assigned admin credentials. In this step, we will give the user WordPress admin access. You can go to the wp_usermeta table next.
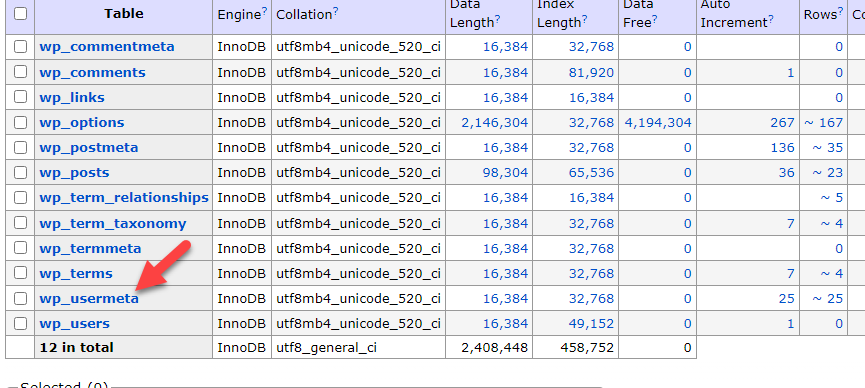
In the usermeta table, go to the insert/new item section.
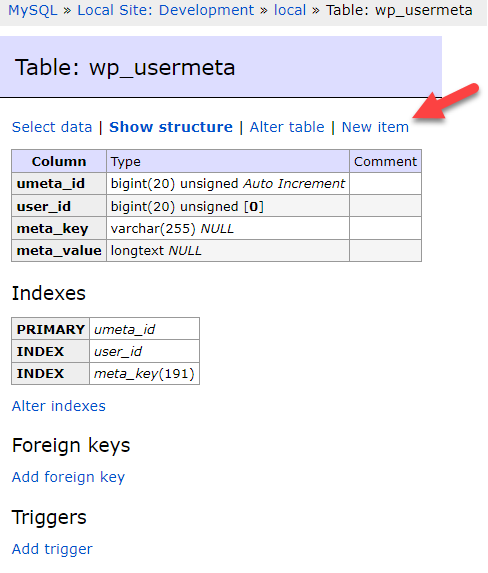
You will see a set of options like this:
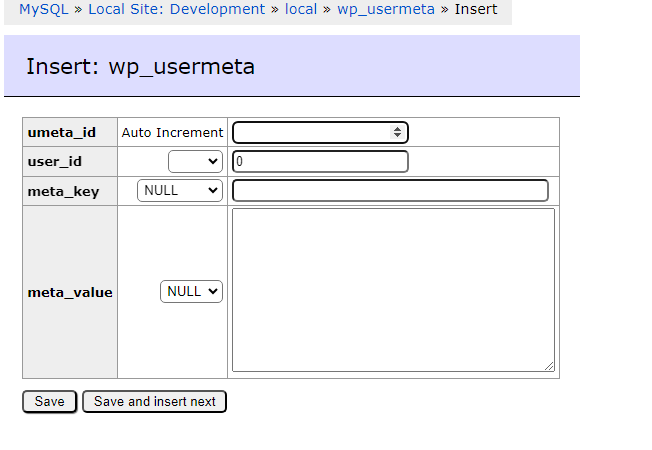
You will see three main options:
- User_id: The user account number- we noted this value earlier.
- Meta_key: Here, you need to add wp_capabilities.
- Meta_value: The meta value is a:1:{s:13:”administrator”;s:1:”1″;}.
After modifying the values, you need to save it.
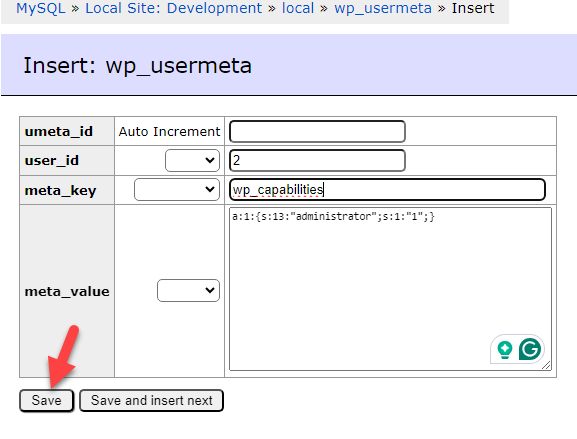
Now, you can log in to the website and see the newly created user as an administrator.
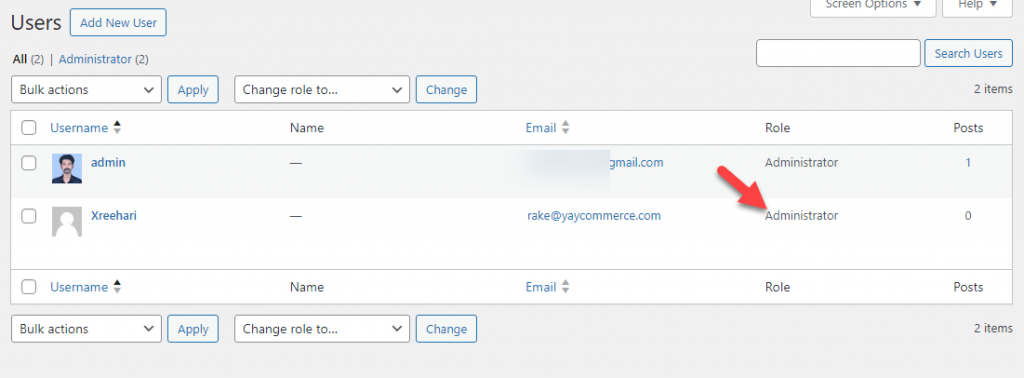
The following section will show you how to modify the user details via the MySQL database.
2. Modify the User Details
Sometimes, we might want to tweak the user details a bit. Keep reading this section if you know how to do it via the MySQL database. Here, we will show you how to do it properly.
Modifying the user data is simple. First, open the user account you need to edit. There, you will see all the editable details.
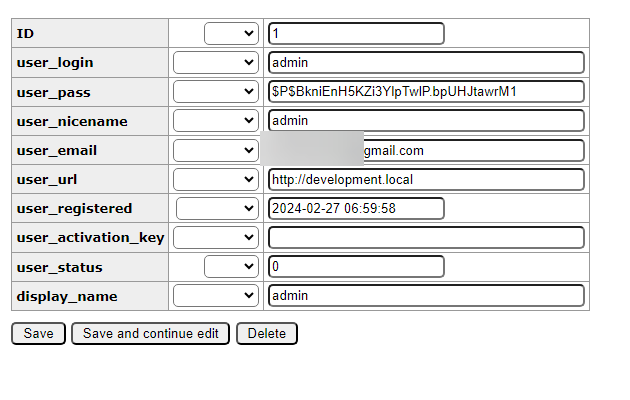
For example, you can modify the username, password, email, website URL, and display name from the database. Once you have done with the modification, save the settings, and you will be good to move forward.
The following section will show you how to delete the user from the website via the database.
3. Delete the User
This section will show you how to delete the user account via the MySQL dashboard. To do this, you need to run some SQL commands.
You still need the user ID to complete this task. The first thing you need to do is go to the SQL command option.
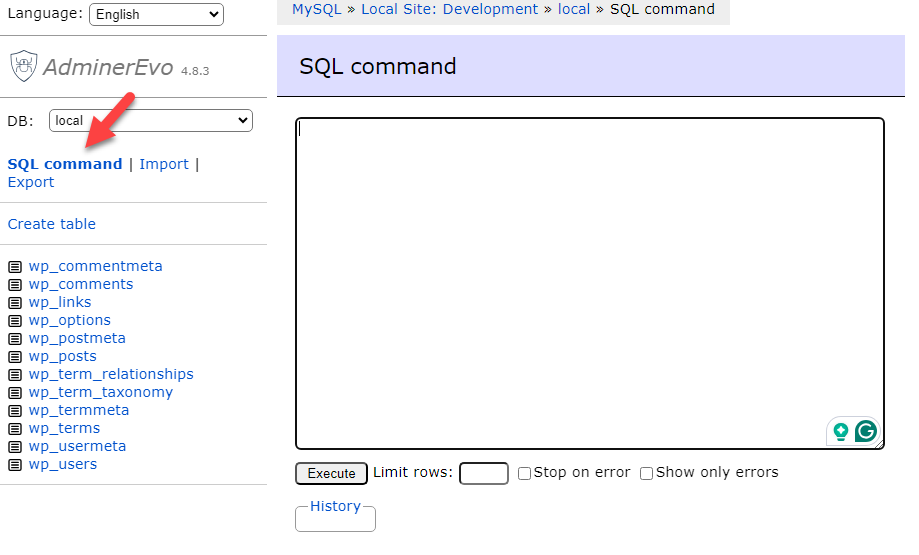
The command you need to run is:
DELETE FROM `wp_users` WHERE ID = 1;You need to replace the ID with your preferred user ID. In our case, the user ID was 2. Once you have pasted the command, execute it.
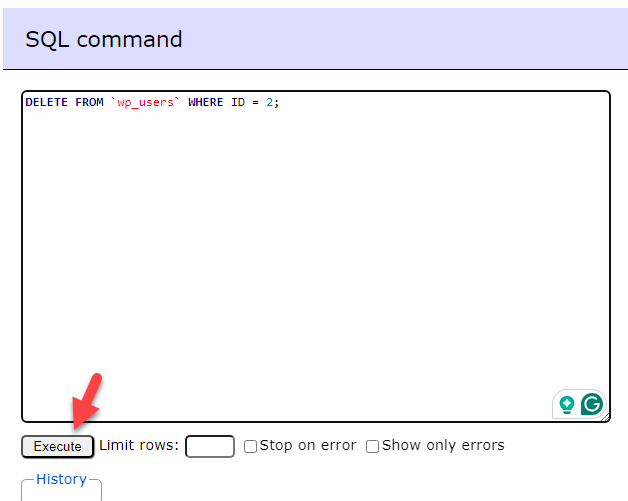
Within a couple of seconds, the command will be executed.
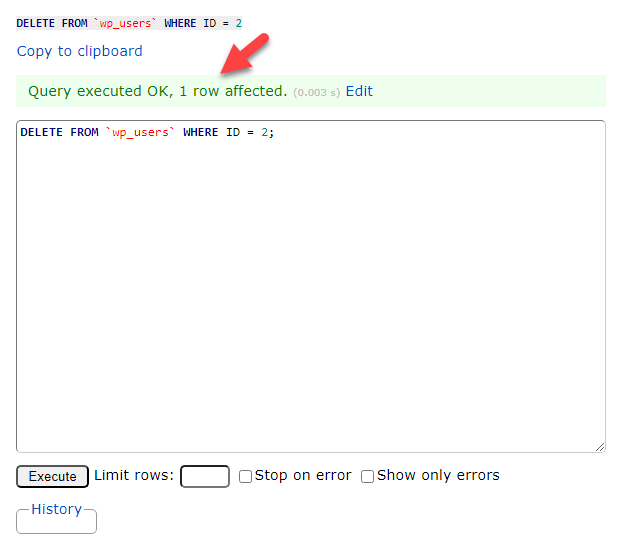
You can verify the account deletion by visiting the wo_users table.
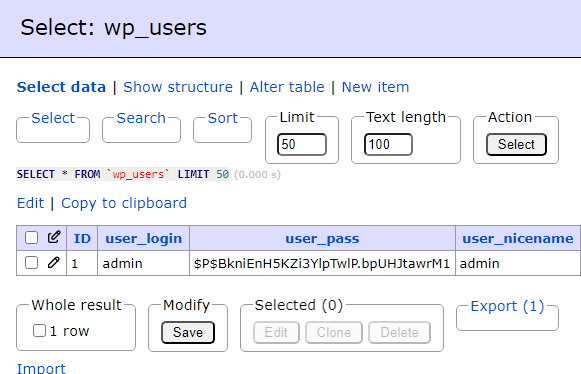
The next thing we are going to do is clean the usermeta. To do it, you need to run this code:
DELETE FROM `wp_usermeta` WHERE user_id = 2As usual, you should replace the user ID with your preferred one.
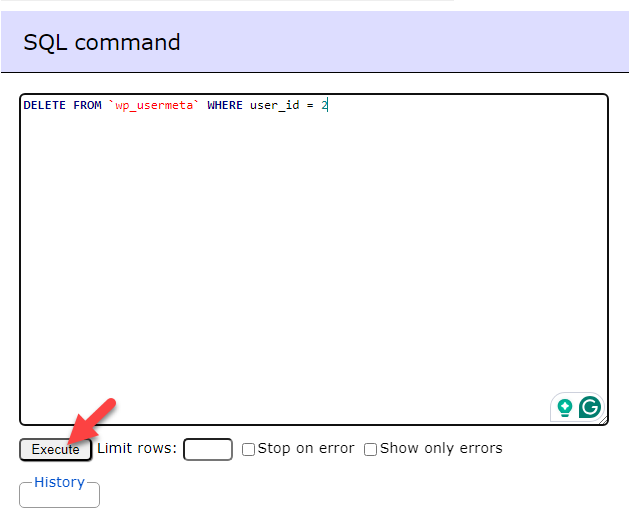
The table will be optimized within a couple of seconds. Next, we will show you how to change the user’s role.
4. Change the User’s Role
Here’s how you need to tweak the user role via database. As always, you must remember the user ID you need to modify. Here, we have the user ID, which is 1.
Under the meta_key option, enter wp_capabilities.
Next, here are the common user roles and commands:
Subscriber
a:1:{s:10:"subscriber";b:1;}

Contributor
a:1:{s:11:"contributor";b:1;}

Author
a:1:{s:6:"author";b:1;}

Editor
a:1:{s:6:"editor";b:1;}

Administrator
a:1:{s:13:"administrator";b:1;}
Depending on your requirements, pick a command and execute it. Once you are done, the user’s role will be modified.
That’s it!
This is how you can change the user role via the WordPress database.
Conclusion
If you do not have access to the WordPress website or are tech-savvy, you should use MySQL to manage WordPress users.
As this article shows, managing WordPress users via MySQL is simple. You can easily add new administrators via this method or modify existing ones via PHPMyAdmin. If you are stuck, we recommend contacting the hosting company for help.
If you need a plugin for these tasks, check out Role Editor.
Before performing these tasks, generate a complete website or database backup. If something goes wrong, you can quickly restore your website without any issues.
Would you deal with WordPress users via the MySQL database?
Let us know in the comments!
Feel free to check out our blog for more articles.

